ShopDreamUp AI ArtDreamUp
Deviation Actions


Description
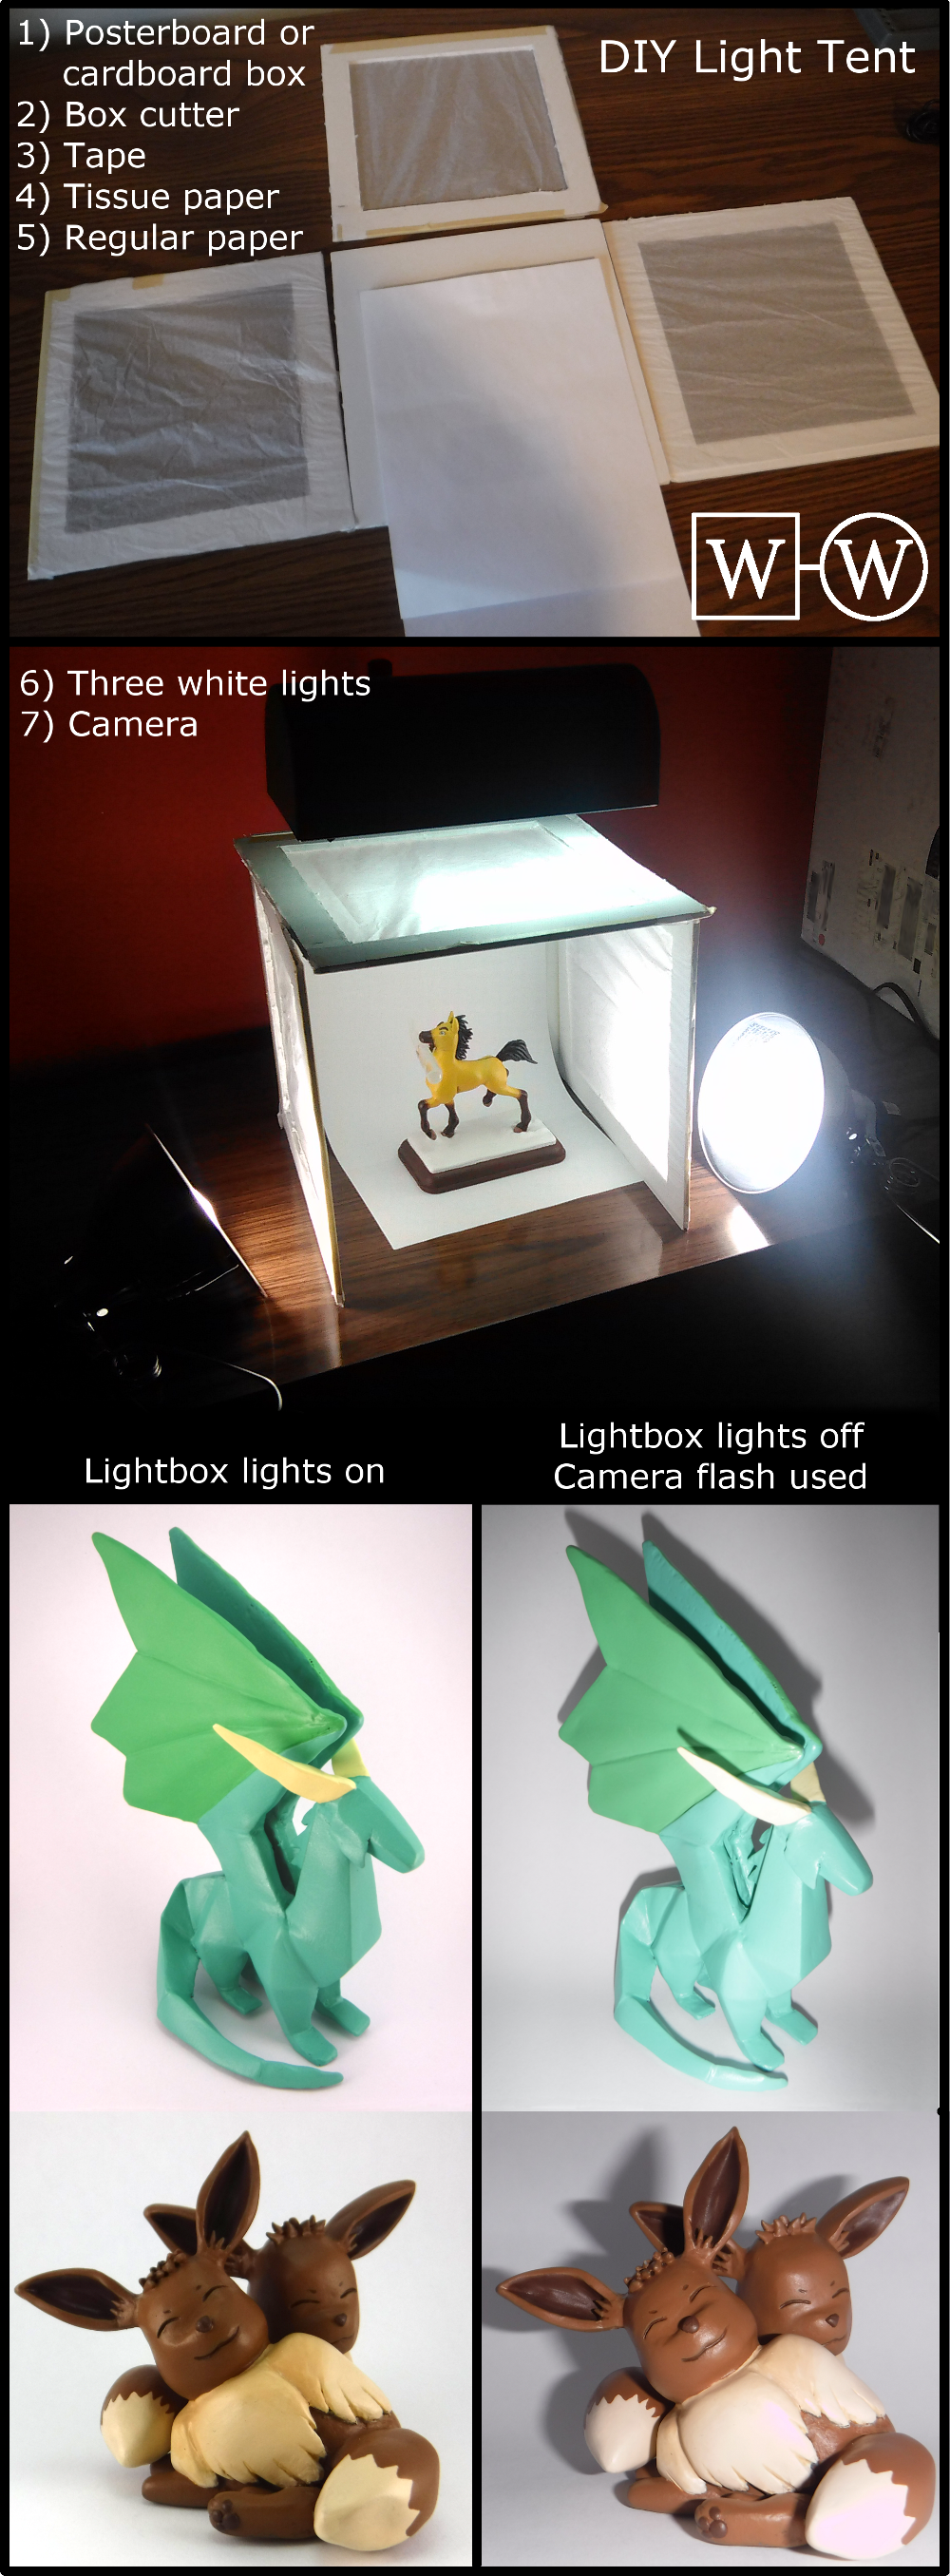
Inspired by CadaverCraft's post here: fav.me/d9ultct, I decided to show my photo setup. Making a lightbox (sometimes called a photo tent or photo cube) is SUPER easy and it makes a huge difference in the quality of pictures you are able to take of your figurines/jewelry/whatever small objects you have. It softens the light so there's no washed out bright spots, while ensuring all sides are lit so there are no shadows. My camera isn't the best but I can still get decent pictures using this setup. You can buy a professional one for around $40, but why spend the money when you can make one just as good with stuff you probably already have?
All you need is listed in the image but I guess I can repeat it here: a cardboard box or poster board, tissue paper, printer paper, tape, a box cutter, and three (or two) light sources. The most important thing is that you find light bulbs that are white (this was the only thing I had to buy). Some lights can be tinted yellow or blue which would change the true colors of your piece.
Take your posterboard and cut it to the desired size. You need it to have a top, back, and two sides. Then tape it together to form a box. If you use a shoe/cardboard box obviously skip this step because it is already a box! If you have three lights, cut the center out of both sides and the top. If you have two lights, cut out only the sides. Tape the tissue paper over the holes you just cut. You have a light box!
For the background, tape the paper to the back of the box. Make sure you leave enough to drape over the bottom for your figure to sit on. This makes a smooth background, with no distracting lines or abrupt color changes. Some people use cloth here, which is probably the better option because it can be any color and length you want. But I am going for cheap so plain paper works fine too.
Position your lights around the outside, place your figure in the center, and start taking great pictures! Hopefully you can really see how much of a difference having a lightbox makes!
Image size
1000x2711px 3.8 MB
© 2017 - 2024 WebsterWorks
Comments12
Join the community to add your comment. Already a deviant? Log In
I could do with getting something set up like this for my pictures.
Currently I just prop up an A3 sheet of thick paper against the wall and my table surface. My lighting consists of the main light in the centre of the ceiling and a natualight LED lamp set up to the side.
I tried making a light box previously but didn't get on with it very well.
Currently I just prop up an A3 sheet of thick paper against the wall and my table surface. My lighting consists of the main light in the centre of the ceiling and a natualight LED lamp set up to the side.
I tried making a light box previously but didn't get on with it very well.